Sunday, October 11, 2009

Activity 19: Restoration of blurred image

I applied motion blur on the image using the algorithm given in the procedure. I then implemented the restoration algorithm. Here are the results:


Original


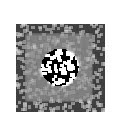
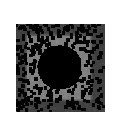
Noised / Restored

The restoration was able to remove the "trace" effect of the blur but some additive artifacts still remain. The method is not in vain however, since it still was effective enough to make the text readable again.

I give myself a 10/10 because I was able to implement the algorithms successfully.

Activity 18: Noise model and basic image restoration

In this activity we explore the different type of image noise and try some techniques for cleaning them. I applied 5 types of noise: impulse, uniform, exponential, gamma and gaussian. I then implemented 4 methods of noise removal: harmonic, geometric, contraharmonic and arithmetic. Here are the results:


Original image


From top to bottom:
salt and pepper / uniform / exponential / gamma / gaussian
From left to right:
arithmetic / contraharmonic / geometric / harmonic / noise only

The images get darker/brighter because I normalized them after adding the noise. For most types of noise, the arithmetic restoration yields the best results. Also, the other methods which rely on multiplication fail at places where the noise peak.

I give myself 8/10 because i wasn't able to implement the Rayleigh noise.

Activity 17: Photometric stereo

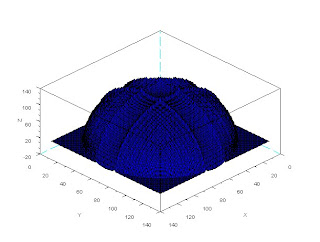
In this activity we reconstructed a 3d object using image data taken from multiple angles. The source images were already given to us and so all we had to do was to write the code to implement the equations. I came up with the following shape:

I give myself a 10/10 because I successfully constructed the 3d object.

Activity 15: Probabilistic Classification

This activity is an extension of activity 14. It uses LDA instead of just taking the euclidian distance in feature space. I used the same photos and features as in activity 14 but i only made use of two classes: leaf 1 and leaf 2. I simply followed the outlined LDA procedure in the link attached with the protocol and my program was able to distinguish between the two leaves for all of 4 test objects.


Classes

f1 =
- 1.3203592
12.37927
36.708249
27.447476

f2 =
- 2.9090572
10.544618
38.737733
29.893865
Results: first two values correspond to leaf 1, last two correspond to leaf 2

I give myself a 10/10 since I was able to implement the outlined procedure and the features I chose proved to be valid for the given set of objects.

Activity 14: Pattern Recognition

In this activity we attempted automated classification. We first extracted the mean features of each class. We then classified test objects by finding the class nearest the object in feature space. I used 4 classes:


Classes
leaf 1/leaf 2/25 centavos/flower

I used 4 features: mean red, mean green, mean blue and shape. To extract a single value for shape, I used the follow function to trace the perimeter of the object the took the ratio of its square to the area. This proved to be a valid measurement as it allowed the distinction between the two leaf classes. I used 5 objects per class to get the mean values and 2 objects per class for testing. My program was able to classify each test object (two tests per class) correctly.

I give myself a 10/10 since I was able to create a program that could classify object based on both color and shape.

Thursday, August 6, 2009

Activity 10: Preprocessing text

In this activity we set out to clean up a scanned document to make it ready for handwriting recognition. Our main goals were to remove unecessary details, i.e. table lines, and to binarize the result. I first rotated the image such that the horizontal lines were parallel to the x axis. I did this by making sure that the maxima of the FFT of the image formed a perfectly vertical line. I then removed the horizontal lines via a vertical mask over the FFT. I then binarized the image using the im2bw function and a threshold of .38.

As an additional objective, we also sought to detect all occurences of the word "description". I did this using the correlation technique we used in activity 5.

RESULTS


Original image / horizontal lines removed / b&w


Basis for correlation


Result of correlation

The removal of the horizontal lines was quite successful. Even though the regularity of the removal is apparent (sinusoidal erasure), it works when we convert the image to B&W. As for the correlation, it works quite well as long as you take only the maxima into account.

For this activity I give myself an 8/10 since I wasn't able to take advantage of morphological operations in binarizing the image.

Activity 12: Color image segmentation

For this activity we try to distinguish ROI's based on their color hues. By changing our color coordinates such that we separate value into an independent variable, we are left with a 2D color map that disregards brightness. With value aside we may now distinguish objects based on color alone.

We achieved the actual differentiation via 2 ways: parametric and non-parametric. In the parametric method, we assume that the color distribution of our object is a Gaussian curve. It is parametric in that we may adjust the standard deviation of the spread to be more or less tolerant. In the non-parametric method, we use the objects actual color distribution and we use the resulting curve for back projection.

RESULTS

Original Image


http://www.missouriplants.com/Yellowopp/Helianthus_divaricatus_flowers.jpg

Parametric approach


Non-parametric approach


It seems that the assumption of a Gaussian distribution of colors results in the manifestation of the white noise on the ROI. This is probably a reflection of the normal distribution of noise on the original image. When we remove this assumption, we get a much more solid and accurate ROI since we use prior knowledge of the objects color distribution. I also observed in my peer's (Sison) work that this method is much more effective in differentiating adjacent colors (e.g. orange and red).

I give myself a 10/10 because I was able to execute the procedure completely and efficiently.

Monday, July 20, 2009

Activity 8: Morphological Operations

In this activity we were tasked to explore the properties of dilation and erosion by applying the said operations on a square, a triangle, a circle, a hollow square and a cross. We are to perform the operations using each of the following: 1) 4x4 square, 2) 2x4 rectangle, 3) 4x2 rectangle, 4) a plus sign of width 1 and length 5. My results are listed below. They are arranged in order of the operators above.

DILATION


EROSION


My predictions for the dilations were spot on except for the triangle dilated with a plus sign. I forgot to note that the bottom side should have manifested the plus sign as square 'clips'. As for the erosions, I was correct for all except the hollow squares. I thought the widths of the operators would have been enough to completely erode the corresponding edges. it seems however that except for the last case (the plus sign operator), thin lines still remained.

I give myself a grade of 9/10 because I was able to execute the procedure completely. My predictions were a bit off hence the -1.